dMb Online

BBQ Lover, Real Ale Monster, Snowboarder, Technical Architect.

  • About Me
  • Contact

Microsoft

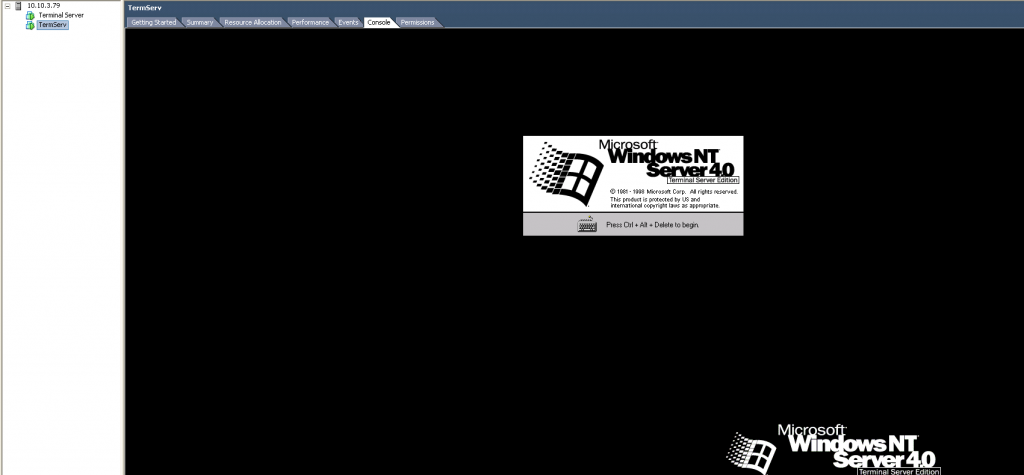
Virtualise NT 4.0 Terminal Server Edition with Citrix MetaFrame whilst its a PDC

08/11/2012 / 1 Comment

We have a customer who has continued to work on IT infrastructure which is twelve years old. They were running three Dell PowerEdge 2400 servers running Windows NT 4.0; it’s a testament to the build quality of these boxes as they’ve kept running with no issues.

The only reason they kept Windows NT 4.0 was due to their retro MRP system not supporting any other operating system.  Two months ago we managed to virtualise their BDC / SQL server and their file server with no issues.

We then attempted to perform a physical to virtual migration of the PDC which is a terminal server with Citrix MetaFrame, this failed miserably. Windows NT 4.0 Server Terminal Server Edition SP6 is not a supported operating system to virtualise with VMware. A pre-requisite of the VMware converter is that you provide it access to the Windows NT 4.0 Service Pack 6 executable so that it can change the HAL (Hardware Abstract Layer) and Kernel executable. Unfortunately the Terminal Server Edition of Windows NT 4.0 uses a different Service Pack executable and has a different Kernel executable, so when the P2V completes it copies the HAL / Kernel from the service pack executable which means you can’t boot the server and you receive a stop error.

The Dell PowerEdge 2400’s had two processors and we were running the MultiProcessor Kernel. After we virtualised the server it wasn’t recognising the two processors and it wasn’t using the Terminal Server Edition Kernel. This meant I had to fudge the HAL.dll and NTOSKRNL.exe from the Terminal Server Edition SP6 executable. I booted the server up with BartPE and backed up the existing HAL and Kernel and then copied the two files from the Terminal Server Edition SP6 executable.

The server then booted with one processor and we used the UniProcessor Kernel.

I then installed the VMware tools and we were in business.

Tools required:

VMware Converter 3.0.3-89816 (Cold Clone Bootable CD)

Windows NT 4.0 SP6 High Encryption executable

Windows NT 4.0 Terminal Server Edition Service Pack 6 High Encryption executable

Windows NT 4.0 Server KB885835-x86 executable BartPE bootable CD

If you would like access to any of the tools used or any assistance please tweet me on @davidbrown85

Posted in: Geeky Stuff, Microsoft, VMware Tagged: Microsoft, NT4, SP6, Terminal Server Edition, TSE, VMware, Windows, Windows NT 4

Exchange 2003 – iPhone / iPad remote email

10/10/2011

Hello all

We have recently had to setup Exchange 2003 to enable access for iPhones and iPads. The server had already been setup for Outlook Web Access, however when attempting to connect an Apple device for email access we received the following error:

Event Source: Server ActiveSync

Event ID: 3029

The mailbox server [exchange.x.com] has its [exchange] virtual directory set to require SSL. Exchange ActiveSync cannot access the server if SSL is set to be required. For information about how to correctly configure Exchange virtual directory settings, see Microsoft Knowledge Base article 817379, “Exchange ActiveSync and Outlook Mobile Access errors occur when SSL or forms-based authentication is required for Exchange Server 2003”.

To resolve this we had configure an additional Exchange Virtual Directory in IIS which didn’t require SSL.

You must use Internet IIS Manager to create this virtual directory for Exchange ActiveSync and Outlook Mobile Access to work.

Locate the Exchange virtual directory. The default location is as follows:
Web Sites\Default Web Site\Exchange

Right-click the Exchange virtual directory, click All Tasks, and then click Save Configuration to a File.
In the File name box, type a name. For example, type ExchangeVDir. Click OK.

Right-click the root of this Web site. Typically, this is Default Web Site. Click New, and then click Virtual Directory (from file).

In the Import Configuration dialog box, click Browse, locate the file that you created in step 4, click Open, and then click Read File.

Under Select a configuration to import , click Exchange, and then click OK.

A dialog box will appear that states that the “virtual directory already exists.”
Select the Create a new virtual directory option. In the Alias box, type a name for the new virtual directory that you want Exchange ActiveSync and Outlook Mobile Access to use. For example, type exchange-oma.

Click OK.

Right-click the new virtual directory. In this example, click exchange-oma. Click Properties.
Click the Directory Security tab.

Under Authentication and access control, click Edit.

Make sure that only the following authentication methods are enabled, and then click OK:

  • Integrated Windows authentication
  • Basic authentication

On the Directory Security tab, under IP address and domain name restrictions, click Edit.
Click the option for Denied access, click Add, click Single computer and type the IP address of the server that you are configuring, and then click OK twice.

Under Secure communications, click Edit. Make sure that Require secure channel (SSL) is not enabled, and then click OK.

Click OK, and then close the IIS Manager.
Click Start, click Run, type regedit, and then click OK.

Locate the following registry subkey:

HKEY_LOCAL_MACHINE\SYSTEM\CurrentControlSet\Services\MasSync\Parameters

Right-click Parameters, click to New, and then click String Value.
Type ExchangeVDir, and then press ENTER. Right-click ExchangeVDir, and then click Modify.

NoteExchangeVDir is case-sensitive. If you do not type ExchangeVDir exactly as it appears in this article, ActiveSync does not find the key when it locates the exchange-oma folder.

  • In the Value data box, type the name of the new virtual directory that you created in step 8. For example, type /exchange-oma. Click OK.
  • Quit Registry Editor.

Restart the IIS Admin service. To do this, follow these steps:

  • Click Start, click Run, type services.msc, and then click OK.
  • In the list of services, right-click IIS Admin service, and then click Restart.

If you want to reuse Forms-based Authentication on the Exchange server, follow these steps to re-enable Forms-based Authentication on the /Exchange virtual directory in Exchange System Manager.

  • Open Exchange Manager.
  • Expand Administrative Groups, expand the first administrative group, and then expand Servers.
  • Expand the server container for the Exchange Server 2003 server that you will be configuring, expand Protocols, and then expand HTTP.
  • Under the HTTP container, right-click the Exchange Virtual Server container, and then click Properties.
  • Click the Settings tab, click to select the Enable Forms Based Authentication check box, and then click OK.
  • Close Exchange Manager.
  • Click Start, click Run, type IISRESET/NOFORCE, and then press ENTER to restart Internet Information Services (IIS).
Posted in: Microsoft Tagged: Email, Exchange, iPad, iPhone
« Previous 1 2

Buy Me a Coffee

Copyright © 2025 dMb Online.

Me WordPress Theme by themehall.com

We use cookies to ensure that we give you the best experience on our website. If you continue to use this site we will assume that you are happy with it.Ok