dMb Online

BBQ Lover, Real Ale Monster, Snowboarder, Technical Architect.

  • About Me
  • Contact

HPE DL380 Gen9 Server Missing NIC

30/10/2020 / Leave a Comment

During routine maintenance, I’ve had occasions where HPE DL380 Gen9 Servers lose the plot when rebooted. Last week was a prime example and the second time this has happened for a server. The server was patched with Windows Updates and restarted before the installation of the HPE Service Support Pack.

At which point it became clear the HPE FlexibleLOM NIC was missing from the server configuration. When checking the system’s BIOS there were no references to the PCI card, in the iLO system information it had completely disappeared. The only NIC’s visible were Adapter 1 – iLO and Adapter 2 – HPE Ethernet 1GB 4-Port 331i Adapter.

Thankfully I’ve been through this before and knew how to work around the issue. Unfortunately, the usual cold boot or iLO resets didn’t work, I had to utilise one of the most trusty troubleshooting tips of all time. The classic ‘fix’ from HPE was to pull the power cords from the server, this then magically ‘resolved’ the issue and we were able to carry on with the scheduled maintenance. After patching the server, I was hoping it would resolve the issue, but alas it didn’t. When the same fault occurred again, I thought there must be an easier way than driving to the location of the server or initiating remote hands support.

This time I decided to utilise a different method to get the server operational. Since iLO 4 version 2.55 a feature was added to perform an auxiliary power-cycle on a server remotely. This can be done by making use of the RESTful Interface Tool. The RESTful Interface Tool connects to the Integrated Lights-Out system and allows the use of a comprehensive iLO RESTful API’s to perform tasks on an iLO system. I followed the HPE reference guide and performed the following commands to initiate the AuxCycle on the server.

Sequence AuxCycle:

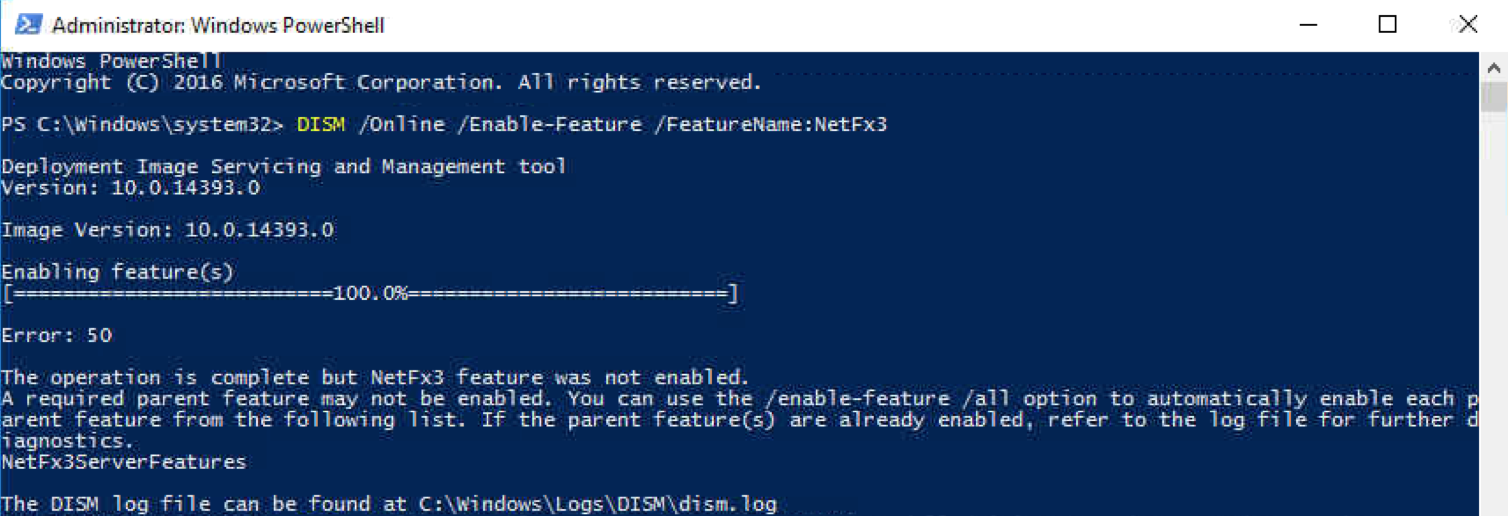
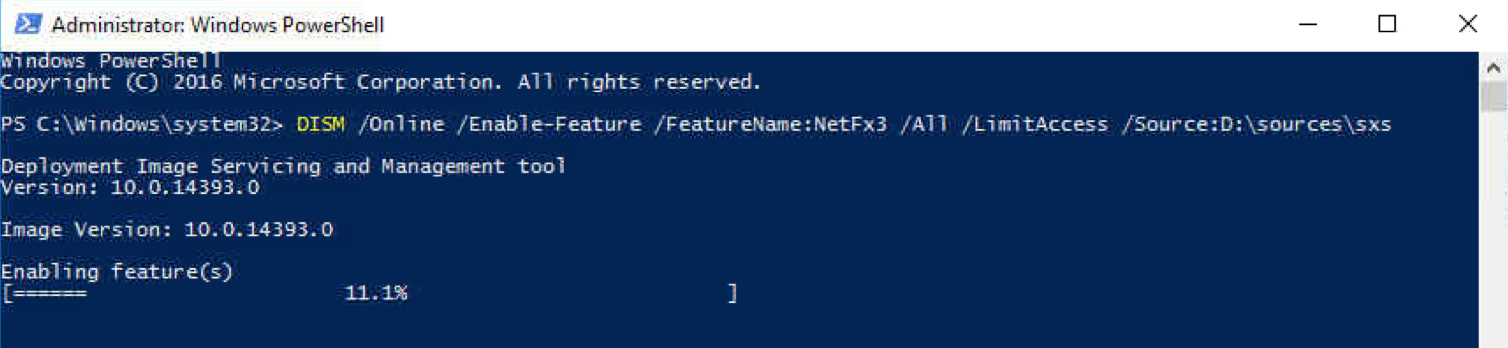
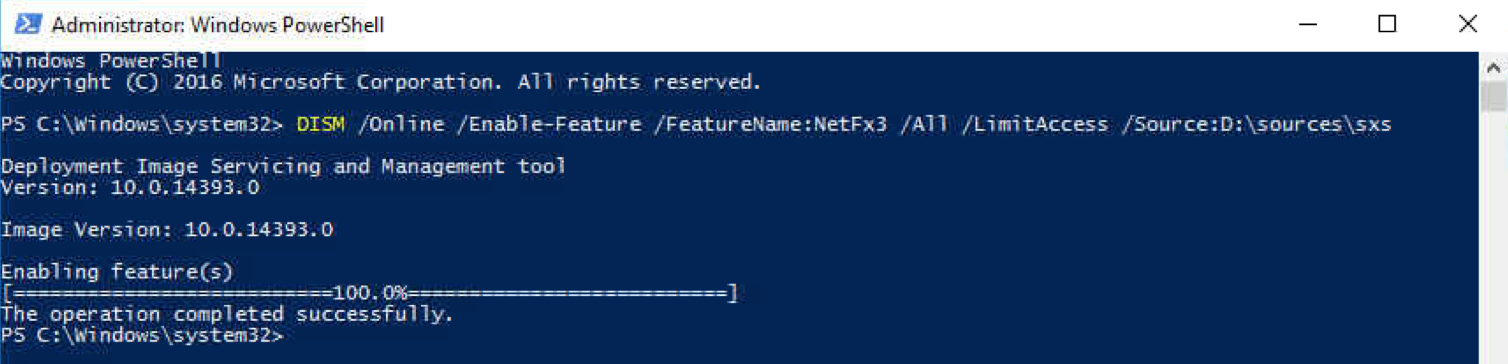
  • Install HPE RESTful Interface Tool
  • Create a text file called auxcycle.json and enter the information below, save it in the location in which you are running the tool. In my example it was located in the user’s documents folder
  • Run RESTful Interface Tool as administrator
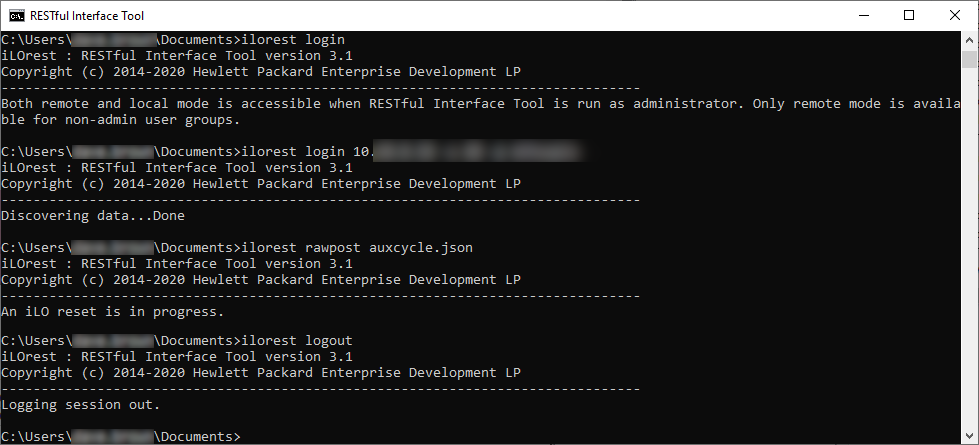
  • Type the following commands
  • ilorest login
  • ilorest login 10.0.1.1 -u adminusername -p password123
  • ilorest rawpost auxcycle.json
  • ilorest logout

{

“path”: “/redfish/v1/Systems/1/Actions/Oem/Hp/ComputerSystemExt.SystemReset/”,

“body”: { “Action”: “SystemReset”, “ResetType”: “AuxCycle”}

}

Contents of auxcycle.json

Please remember to change the IP Address, Username, and Password values to ones that apply to your environment.

After performing the commands listed, the iLO reset itself, the system was turned on and after completing a success POST the FlexibleLOM NIC appeared.

Server Configuration:

  • HPE DL380 Gen9 BIOS Version P89 V2.76 (21st October 2019)
  • ILO Version 2.73 (11th Feb 2020)
  • TPM 2.0
  • HPE FlexFabric 10Gb 2-Port 556FLR-SFP+ Adapter Firmware 12.0.1110.11

HPE Reference: https://support.hpe.com/hpesc/public/docDisplay?docId=emr_na-a00047494en_us

HPE Restful Interface Tool: https://buy.hpe.com/us/en/software/infrastructure-management-software/system-server-management-software/hpe-system-server-software-management-software/restful-interface-tool/p/7630408

Posted in: HPE, Info Tagged: 556FLR-SFP+, AuxCycle, DL380, FlexFabric, HPE, NIC, RESTful Interface Tool

XenApp 6.5 Licensing Issues

29/06/2017 / Leave a Comment


Its been a challenging week at work so I thought I’d document something I’ve not come across before in my 6 years of dealing with Citrix XenApp 6.5. Now you might say, serves you right for using a product that’s end of life with limited support. Anyway, after routine maintenance of a XenApp 6.5 session host we realised that no users were able to get logged in via Citrix Receiver. I got notified by our support team who required further assistance as its not something they’ve seen before.

I logged onto the system to interrogate the event log and it became apparent quite quickly why users couldn’t login. The error stood out like a sore thumb in a relatively clean event log:

Source: MetaFrame

Event ID: 9009

Description: Citrix XenApp is unable to retrieve the license server location. Check to see if the Citrix Independent Management Architecture service is running without errors. If necessary, set the license server location in the Citrix Group Policy.

Opening an elevated command prompt window enabled me to run the following command to confirm there was a licensing issue:

qfarm /load

If the server load is 20000 it means there is a licensing issue which needs resolving. Restarting the XenApp server made no difference so it was clear there was something a little more serious going on.

I decided to open the Remote Desktop Session Host Configuration MMC so I could check the RDS licensing was all present and correct, however the following message appeared:

It wasn’t looking good at this point and there weren’t any further errors in the event log for me to go on. I ran a chkdsk on the server as I suspected disk corruption, however Windows 2008 R2 is pretty good when it comes to keeping the file system in order and it was fine. In the past I’ve had to rebuild the WMI Repository when I’ve had issues with MMC. I suspected this could be damaged and could be the route cause of the issue. The WMI Repository is a database which stores meta information and definitions for WMI classes. 

I started by re-registering all of the dlls and recompiling the .mofs along with re-registering the WMI Service and Provider.

cd %windir%\system32\wbem
for /f %s in ('dir /b *.dll') do regsvr32 /s %s
regsvr32 %windir%\system32\tscfgwmi.dll
wmiprvse /regserver
winmgmt /verifyrepository

for /f %s in ('dir /b *.mof *.mfl') do mofcomp %s
net stop winmgmt
net start winmgmt

After restarting the server the Remote Desktop Session Host Configuration MMC started working and confirmed the licensing was correct.

Unfortunately the server still didn’t obtain a license, I then ran a Group Policy update which failed. Thankfully it all started to come together from here, I could see that the standard Microsoft Group Policies were applying successfully. However the Citrix Group Policies were failing which made it very clear where I needed to focus my efforts next.

I renamed the following registry key:

\HKEY_LOCAL_MACHINE\SOFTWARE\Policies\Citrix

Followed by renaming the following directory:

%PROGRAMDATA%\Citrix\GroupPolicy

I then ran a Group Policy update (gpupdate) in command prompt and received no errors. When looking in the eventlog  I noticed the following message which I was very pleased to see:

Wahoo, one Citrix XenApp back up and running. I hope the article is helpful, it took me a little while to piece it all together.


Posted in: Citrix Tagged: Citrix

SQL 2016 configuring database mail on Windows 2016

02/03/2017 / Leave a Comment


Recently I’ve started using SQL 2016 with basic availability groups for a new Citrix deployment. Whilst going through the configuration of my maintenance plans I thought it would be sensible to setup email notifications. I went through the following process of setting up database mail however I stumbled across an issue where the emails weren’t being sent.

To configure Database Mail open up the SQL management studio and right click Database Mail and select Configure Database Mail:

Configure SQL Database Mail

We will follow through the wizard to complete the basic configuration:

Start the Database Mail Configuration Wizard

Select set up Database Mail by performing the following tasks:

If the Database Mail feature is not available you will be asked to enable the feature, select Yes:

Create a new profile by populating the fields with meaningful information, then add an SMTP account:

Enter the relevant email settings for your server, this could be a local SMTP which allows relay, an Exchange server or even a Gmail account:

Select next:

Select the public checkbox next to the profile you have created:

Select next:

Select finish:

If everything goes to plan you will have no errors on this next bit, you can then select close:

Right click Database Mail and select send test e-mail:

SQL send Test E-Mail...

Enter the email address you would like to send the test email to and select send test e-mail:

Wait a short while to see if you receive the message, I waited 60 seconds before I thought something wasn’t right:

After clicking OK nothing happened, my first line of troubleshooting was connecting to the Exchange server with Telnet. I was able to confirm I could send an email by entering in the commands manually. There were no logs under Database Mail on the SQL server, so I proceeded to check the Database Mail queues.

Create a new query and enter the following for SQL 2016:

SELECT * FROM msdb..sysmail_event_log order by log_id DESC
SELECT * FROM msdb.dbo.sysmail_mailitems
SELECT * FROM msdb.dbo.sysmail_sentitems
USE msdb
SELECT sent_status, *
FROM sysmail_allitems
SELECT is_broker_enabled FROM sys.databases WHERE name = 'msdb';
EXECUTE msdb.dbo.sysmail_help_status_sp

You can see that the sent_status of the mail is unsent.

Open Windows Explorer and navigate to the following location:

When double clicking on DatabaseMail.exe I received the following message stating the following feature couldn’t be installed. Clear there is a requirement for .NET Framework 3.5 (includes .NET 2.0 and 3.0):

Open PowerShell, make sure you run it as administrator otherwise you will receive the following error:

With Windows 2016 you will need to specify an additional source such as a DVD or ISO, enter the following command:

DISM /Online /Enable-Feature /FeatureName:NetFx3 /All /LimitAccess /Source:D:\sources\sxs

You will need to make sure you mount the ISO or insert the Windows 2016 DVD and select the correct path:

DISM installation in progress

Installation completed:

DISM installation completed

If you attempt to open DatabaseMail.exe now it will send the items in the queue.

I hope this helps and saves some head scratching!


Posted in: Geeky Stuff, Microsoft, SQL Tagged: Database Mail, SQL 2016
1 2 … 11 Next »

Buy Me a Coffee

Copyright © 2025 dMb Online.

Me WordPress Theme by themehall.com

We use cookies to ensure that we give you the best experience on our website. If you continue to use this site we will assume that you are happy with it.Ok